

You've just returned home after an amazing trip abroad (or from your favorite local beach dive), and you've created some "keepers." Awesome! For many of us underwater photographers, we can't wait to share, publish, or print our creations. In this article I will walk you through the five basic steps for processing underwater photos. I take these steps after uploading my photos to my image editing software of choice, Adobe Lightroom. Many of these steps also apply to programs like Aperture, but for the purposes of this article I will focus on Lightroom.
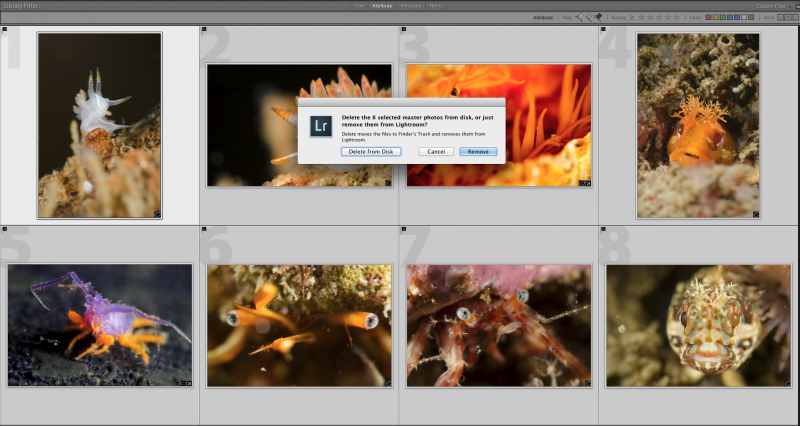 After importing my images, I flag all the "throw away" images, select them all, and "Delete From Disk."
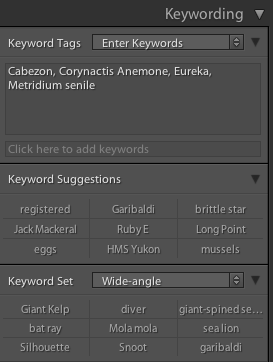 I have a Keyword Set for "Wide-angle," which helps speed up the process of commonly photographed subjects. Based on your image, Lightroom 5 will also display suggestions, which is nice. Thanks, Adobe!
Here are the items I always include in my keywording process:
I have a Keyword Set for "Wide-angle," which helps speed up the process of commonly photographed subjects. Based on your image, Lightroom 5 will also display suggestions, which is nice. Thanks, Adobe!
Here are the items I always include in my keywording process:
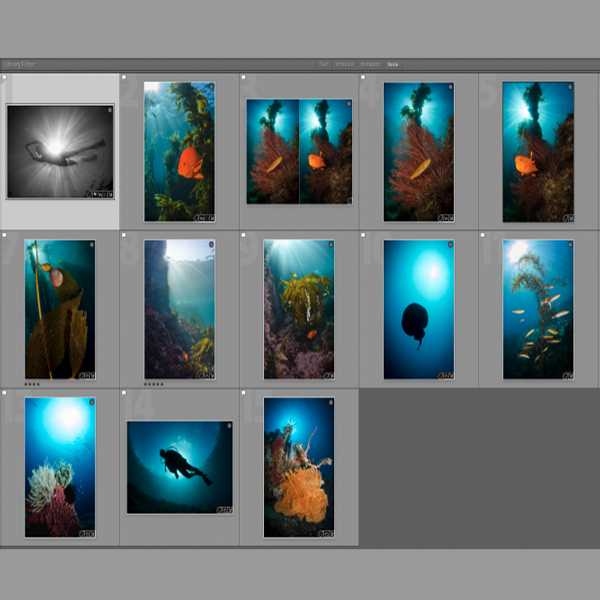
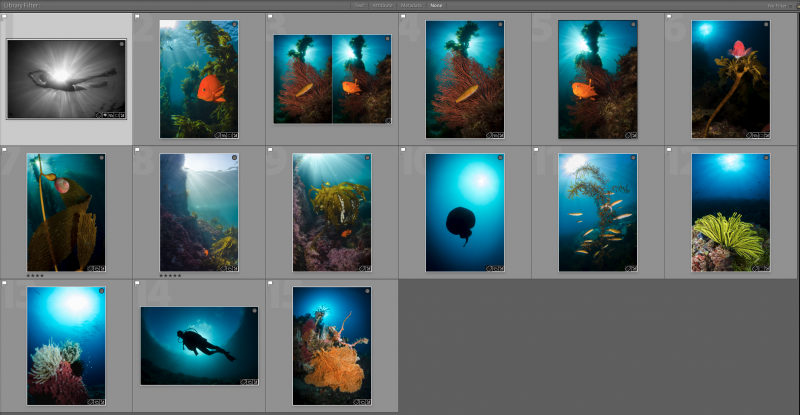 Here are some of my "keepers" from my recent article I wrote on shooting the sun ball. I can easily find these again by clicking on the "white flag" filter in Lightroom.
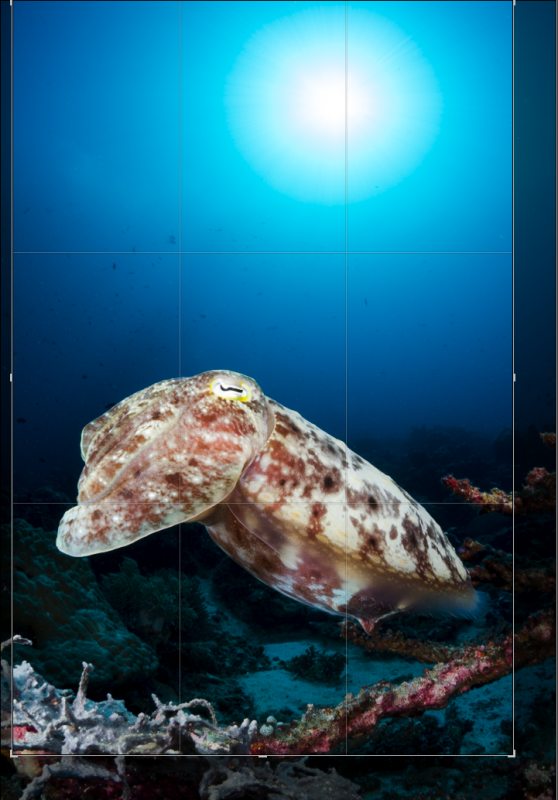 By keeping the original aspect ratio, I can crop slightly in order to achieve the optimal (in my opinion) composition.
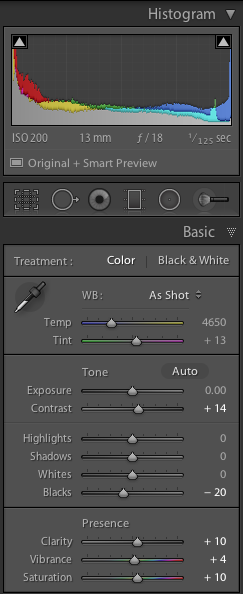 This is a the basic development panel for the image of the cuttlefish above.
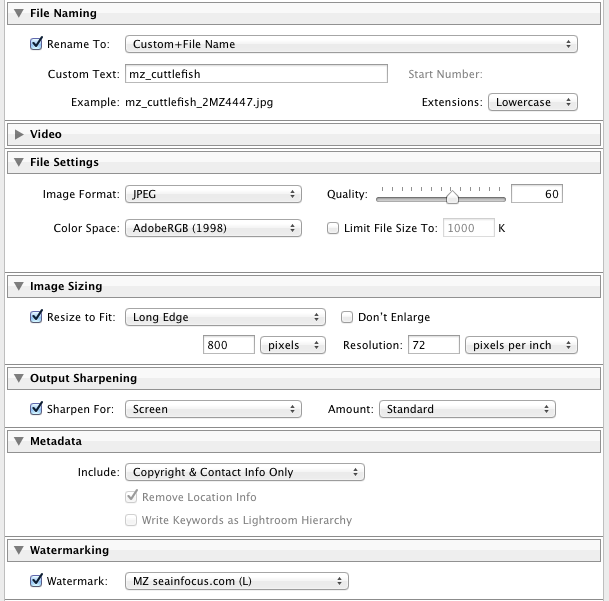 This is the export window in Lightroom. This figure shows my preset when exporting images to be shared on the web. Be sure to always include your copyright information!
Processing Underwater Photos Step 1: Weeding Out the "Duds"
Yes, digital storage space is cheap these days, but what's the sense in keeping photos of fish butts or photos that are out of focus? There are times when I will keep a less-than-desirable photo for the purposes of instruction (e.g. what I could have done better), but for the vast majority of the time, those photos get purged. I review each photo, one by one, and flag all of the photos that are test shots, out of focus, have really poor lighting, etc. Then I'll select all of those photos, and delete them from my hard drive.
After importing my images, I flag all the "throw away" images, select them all, and "Delete From Disk."
Step 2: Keywording
In my opinion, this is one of the most, if not the most, important step in processing underwater photos. This is one of the most efficient ways of locating your images in your library. For example, if I'm looking for an image of giant kelp and a diver, I simply type that into the search field, and voila, any images that have those two keywords in my Lightroom library appear in a split second. No need to search through folder after folder to find images. Sweet! In addition, should you ever submit your images to an agency or publication, they often require that all images be keyworded. Save yourself the future hassle and do it when you import.I have a Keyword Set for "Wide-angle," which helps speed up the process of commonly photographed subjects. Based on your image, Lightroom 5 will also display suggestions, which is nice. Thanks, Adobe!
Here are the items I always include in my keywording process:
- Location: Specifically, the dive site. I have this set up as a hierarchy within Lightroom, so that the dive sites are included under the country of origin (e.g. United States > California > Catalina Island > Farnsworth Bank).
- Critters: The main subject(s) in the photo.
- Background subjects: For example, kelp, coral, diver, etc. Basically, I include any other identifiable item in the image.
Step 3: Identifying the Winners
So by now you've successfully deleted your fish butt shots and have keyworded all of your remaining underwater photos. Now it's time to focus on the photos you want to highlight and share. In this step, I review each photo again, and "flag" the photos I think are the best in the bunch. For example, if I have five shots of a mutton snapper, I will choose the one I think is the absolute best, and flag that one. Continue in this fashion for the remaining photos, then move on to Step 4.
Here are some of my "keepers" from my recent article I wrote on shooting the sun ball. I can easily find these again by clicking on the "white flag" filter in Lightroom.
Step 4: Cropping
Select one of your winning shots, click on the Development module, and start with cropping (if necessary). In the Development module of Lightroom, the cropping tool is the very first tool at the top. Adobe has organized the tools in the Development module in a way in which they think is the most practical approach to developing your images (and I happen to agree). The way in which one crops an image can, in my opinion, make or break the composition. As a general rule, I will maintain the original aspect ratio of the image. In my experience, things can go a bit sideways when you crop using custom aspect ratios. I encourage you to experiment, and see what works best for you. Also, be sure to reach out to your peers for feedback and constructive criticism.
By keeping the original aspect ratio, I can crop slightly in order to achieve the optimal (in my opinion) composition.
Step 5: Developing in the Digital Darkroom
Now comes the fun part. Since a vast majority of underwater photographers I know shoot RAW, I'm going to focus on developing that file type. For those of you that shoot JPG, the camera makes all of the following decisions for you, which, in some cases, is great. As a standard process in Lightroom, I generally increase the following global aspects for my underwater photos. Of course there are several useful and effective tools in Lightroom and I am just barely scratching the surface. You may find the points below to be a good starting point.- Contrast: One of the most important things you can do with your underwater photo is improve the contrast. Shooting through water tends to suck the contrast out of a photo. Simply move the contrast slider to the right until the photo looks good to your eye.
- Clarity: Bumping up the clarity a bit helps enhance the detail in the image.
- Vibrance: Helps the mid-tone colors "pop" a bit.
- Saturation: Self-explanatory. However, underwater photos tend to need a little help in this department, due to the water absorbing colors, especially if you weren't close enough to the subject.
- Sharpening: When shooting JPG, the camera automatically adds sharpening to the photo. This is not the case when shooting RAW. But, be careful not to over-do it, or your photos will begin to look over-processed.
This is a the basic development panel for the image of the cuttlefish above.
*Bonus* Step 6: Exporting
You've combed through all of your shots, added keywords, cropped (hopefully minimally) for the best composition, and developed your winning photos. Now it's time to export and share/print/publish! Based on what your goal is, export the file size appropriate for the job.
This is the export window in Lightroom. This figure shows my preset when exporting images to be shared on the web. Be sure to always include your copyright information!
